Install Pi-hole on Raspbian Lite From Scratch

Pi-hole is a fantastic product for your home network and allows ad blocking at the network level. My install Pi-hole article will walk you through every thing you will need to do to install Pi-hole from scratch using a low power Raspberry Pi.
Requirements
While there are many ways to install Pi-hole and many different operating systems and hardware you can use, for this article we are going to be using the following to install Pi-hole on your network. I assume you are starting from scratch so if you have any of the below you can skip purchasing them, obviously.
Hardware
- Raspberry Pi B 3+ with Power Supply and Heatsinks – This is the latest version of the Raspberry Pi and comes with a power supply and heatsinks.
- Samsung Evo Plus 32GB MicroSD HC Class 10 UHS-1 – Picking the right microSD card is important. Reliability and speed are crucial to the performance of your Raspberry Pi.
- Anker 8-in-1 USB 3.0 Portable Card Reader – In order to write Raspbian Lite to your microSD card you will need a microSD reader if your computer does not support it already.
- Ethernet Cable – Any Cat 5E or higher rated cable will do. The Raspberry Pi B 3+ is limited to USB 2.0 bus speeds so no matter what you do you will not be able to reach Gigabit speeds.
- An open Ethernet port – Your Raspberry Pi will need to connect to your network, either by your router or a switch.
- Router – Finding a router is outside the scope of this article. When I start researching a product I first check out Amazon.com and check out how many reviews the products have. There are also many websites that review routers that you can base your decision off of. I personally enjoy The Wire Cutter who keeps all their articles updated.
- TRENDnet 5-Port Unmanaged Gigabit GREENnet – If you already have a router and just want to expand your network, an unmanaged switch is a cheap and easy way to do so.
Software
- Windows 10 – Windows 10 will be used to download our operating system and then write it to our microSD card.
- Raspbian Lite – We will be installing Raspbian Lite to run Pi-hole.
- Etcher – We will be using Etcher to burn the Raspbian Lite to our microSD card.
- MobaXterm – MobaXterm will allow us to remotely manage our Pi-hole server.
- Pi-hole – The reason we are here.
Install Raspbian Lite
Head on over to the official download page and grab the Raspbian Stretch Lite download. Take your microSD card and put it into your microSD card reader then plug it into your computer.
Format Your microSD Card
We will be using Disk Management to format and name your microSD card. If there are no other partitions on it you can skip this step and move on to installing with Etcher as Etcher will format your card as well. Using Disk Management will make sure that you only have one partition for your Raspbian Lite install.
In Windows 10 search menu type create and format like below:

Once open, find your microSD card and delete any partitions associated with it. You should end up with your microSD card with nothing by unallocated space like below:

Now we need to create a new Volume so right click the area that says Unallocated and then select New Simple Volume:
Follow the new window steps to create your volume. You do not need to change anything, other than the name of the volume should you choose to. In my example, we are going to use the name RaspLite.

Click Next and then Finish and now we have our new volume ready to install via Etcher.
Install Raspbian Lite with Etcher
If you haven’t already, go to Etcher.io and download the latest version and open it up. Etcher is simple, you simply need to select the image, which you downloaded earlier and then select your microSD card and then hit Flash.

The Flash will take a few minutes, depending on your setup. We have one more step to do before we install the microSD card into your Raspberry Pi.
Enable SSH
Before we install our microSD card into the Raspberry Pi we need to make sure we can log in via SSH since we are going to run the Raspberry Pi headless (CLI only). Doing this is easy. In your Windows Explorer simply open up your microSD drive and then create a new file simply called ssh. No file name extension is needed.
The easiest way to do this is to right click, create a new text file, name it ssh and then remove the .txt file extension.

The end result will look similar to this:

Now we are ready to install the microSD card into our Raspberry Pi and turn it on.
Connect To Raspbian
At this point you should have your microSD card in your Raspberry Pi and your Raspberry Pi should be booted. Simply plug in the power to your Raspbian, make sure it is plugged into your network and then follow the next steps once it has booted.
Download MobaXterm
MobaXterm will be our way of managing our Pi-hole on our network. Download it via their website. The free version is plenty fine for what we are going to do but if you do more I highly recommend the paid version as the quality of this software is fantastic.
Once downloaded we are going to create and save a new session.
Create New Session
Open MobaXterm and then select the Sessions menu and then click New Sessions. On the new window choose SSH. Fill in like below, replacing with your ip address.

Click Ok and then simply double click your new Session to open a connection to your Raspberry Pi.
As per the screenshot above, your username is simply pi. The default password is raspberry.
Change Raspbian Lite Password & Update
The first step we are going to take is to change our password. The command is simply:
passwd

Simply follow the instructions as above and now you have a bit more secure Raspbian Lite installation.
Our next step is to update Raspbian Lite and make sure we have the latest version of all of our files. Run the following commands:
sudo apt-get update
sudo apt-get dist-upgrade
Once done we are ready to install Pi-hole!
Install Pi-hole
The steps to install Pi-hole is the easiest part out of all of this. We can do this simply by running 2 commands. As we are going to use Google DNS as our upstream DNS server as well as install the rest of the options as default so we do not have to change anything at all in the installation script. If you wish to use another upstream DNS then I will note below where you will need to make the change. The rest of the options are up to you to disable or enable at your choosing.
Commands
Run the following two commands to start the installation:
wget -O basic-install.sh https://install.pi-hole.net
sudo bash basic-install.sh
The installation script will run and eventually you will be shown this screen:
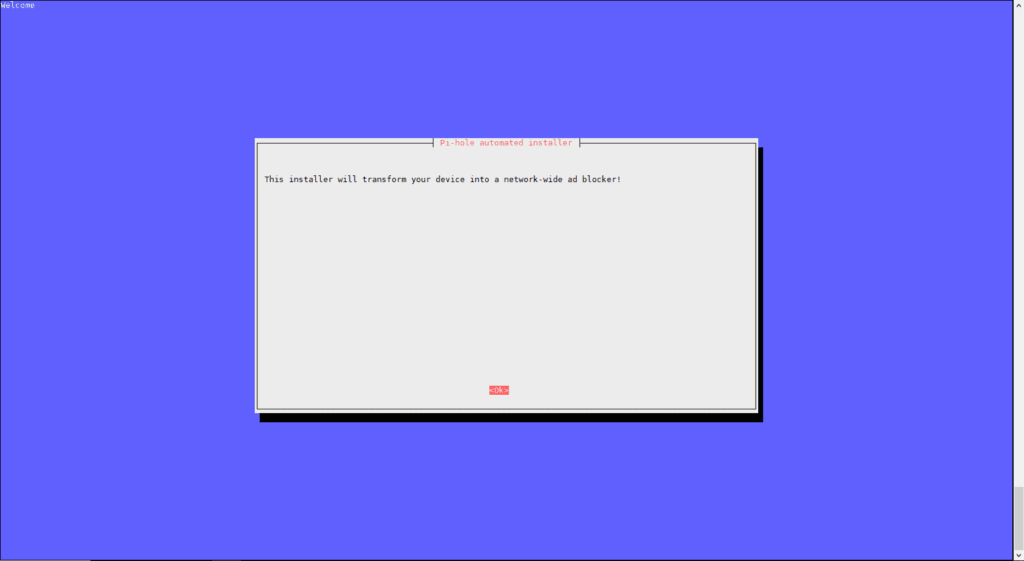
You can hit enter the rest of the way through if you want to use Google DNS for upstream. If you wish to use another upstream provider then you should stop on this screen and make your changes:
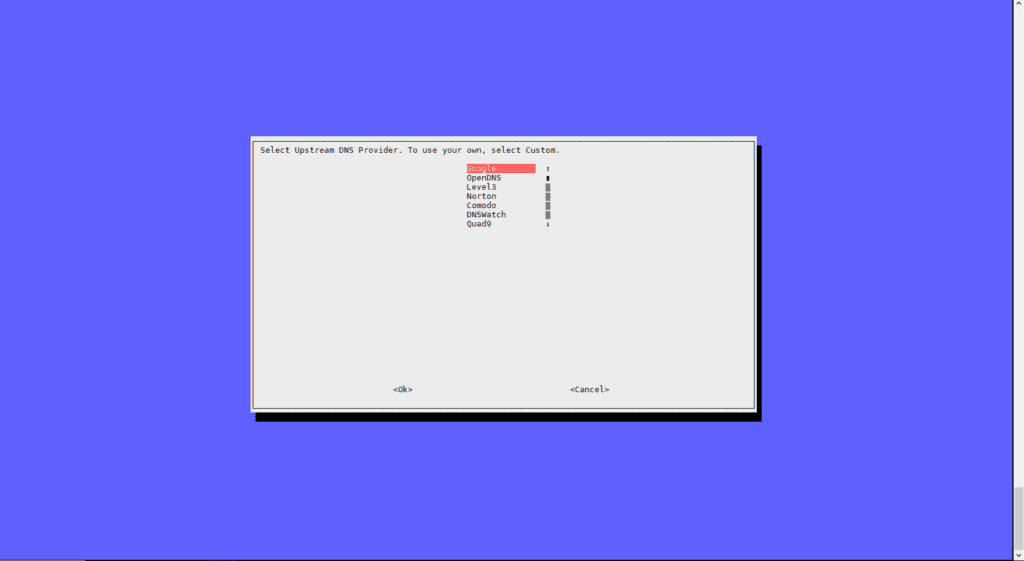
The installation should finish and you should land on this screen:
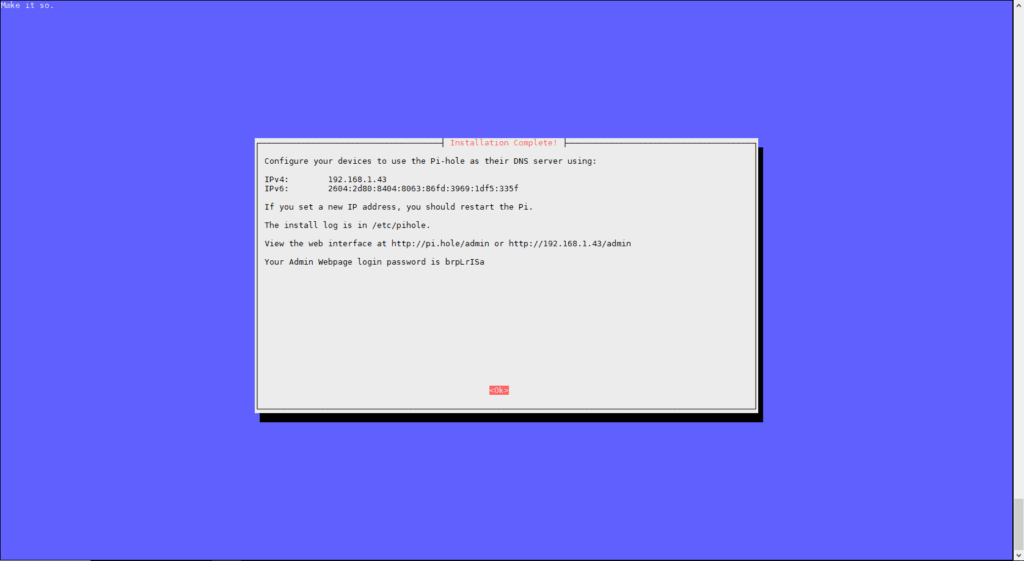
Your finish screen will show you the IPv4 and IPv6 addresses you will need to use in your router so that your router can forward all DNS requests to your Pi-hole server instead of your ISP.
Hit enter and you will be brought back to your command line screen. It is important to note your web interface password here so you can login later. It will be shown like this:

Final Configuration
The final configuration steps largely depend on your home network’s setup. How you configure your router to point to Pi-hole depends on your router’s model. You can check out this page for some examples or refer to your router’s documentation or support page.
Once you have configured your router and requests are being sent to your Pi-hole server, you will more than likely want to view stats and be able to change settings with via more than just the command line. That is where the Pi-hole web interface comes in.
On the finish page you are given your Pi-hole’s ip address. Type that into your web browser and add /admin to the end. From my screenshot, I would type in the following:
192.168.1.43/admin
You will be shown the following screen:
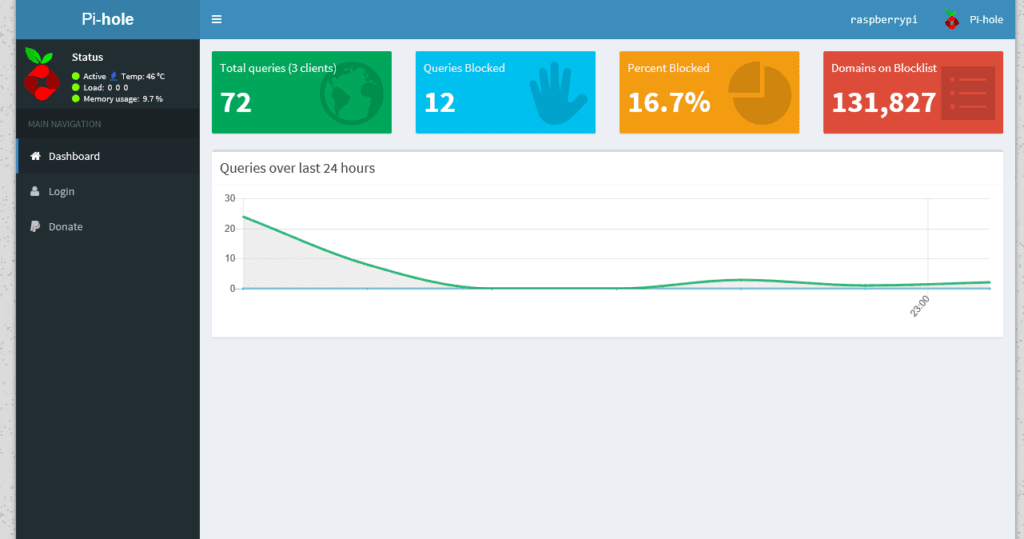
From here you can click the Login link and use the web interface password noted previously to login to your dashboard to see even more stats and settings for your Pi-hole server.
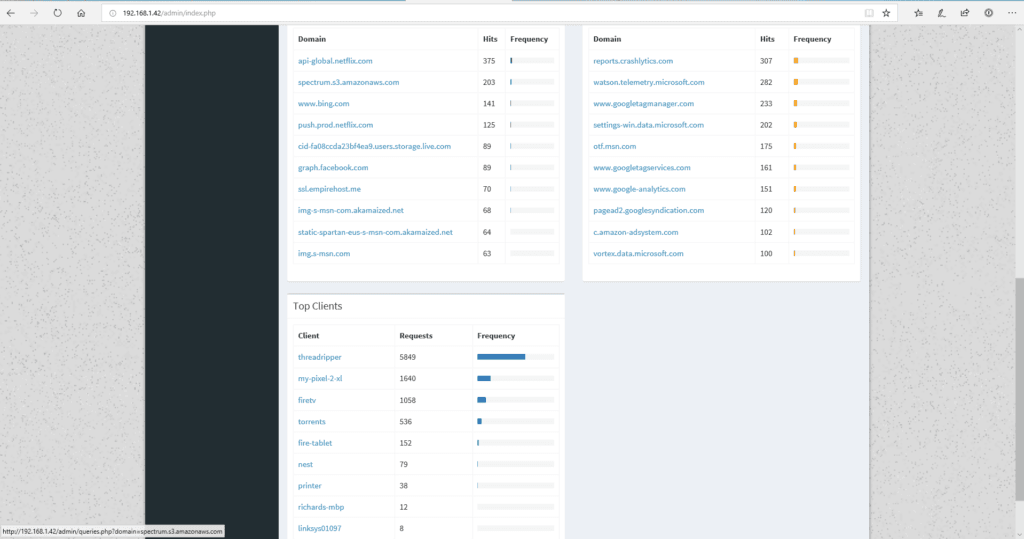
After running for awhile, you can see quite a bit of information as seen below:
DNS-Over-HTTPS
If you wish to move to a more secure DNS I recommend checking out this article for how to run DNS-Over-HTTPS, which I do for both of my Pi-hole servers.
Devices With Hard-coded DNS
If you find that some of your devices are not hitting your Pi-hole it is more than likely because they have their DNS hard-coded. Popular devices such as the Chromecast are guilty of this. If you have an EdgeRouter X, you can check out my guide on how to capture hard-coded DNS queries on your network and redirect them to your Pi-hole. You can also check out this thread on Reddit for other devices.
Setup Automatic List Updates
Now that everything is configured perfectly we want to make sure that the block lists are always updated so that we stay on top of advertisers, malware and tracking domains. To do this we are going to setup a cron that will update your Pi-hole block lists each day at 7 AM. The command to do that is crontab:
crontab -e
You will be asked, if this is the first time running crontab, which editor you would like to use. Nano is my preferred editor so I am going to choose 2.
You will then scroll to the very bottom of the file and place the following on the last line:
0 7 * * * pihole -g
It will look like this:

Now save by hitting
CTL + O
and exit with
CTL + X
Your Pi-hole will now update automatically each day.
Setup Log2Ram
Log2Ram is a great for your Raspberry Pi because it reduces the number of times that Pi-hole writes to your SD card, which can reduce the lifespan of your SD Card. The Log2Ram GitHub page has all the information you need to set it up and customize it so check it out.


