
Table of Contents
- The Threat Landscape for Modern Web Servers
- Analyzing Nginx Vulnerabilities on CentOS 8
- Prerequisites and Scope of Implementation
- Deploying Let's Encrypt for SSL/TLS Encryption
- Configuring Fail2Ban to Mitigate Brute-Force Attacks
- Validating Security Protocols and Maintenance
The Threat Landscape for Modern Web Servers
A freshly provisioned server is not a quiet place. The moment a virtual private server acquires a public IPv4 address, it joins a hostile neighborhood patrolled by automated botnets that never sleep. When our team began mapping the exposure window on newly built hosts, the speed surprised even seasoned operators.
Scanners typically begin probing exposed port 22 and port 80 within roughly 15 to 45 minutes of the address going live. That is not a typo. Before you have finished configuring your first virtual host, opportunistic crawlers are already cataloguing your open services and testing default credentials.
The second pressure point is the transport layer itself. Unencrypted HTTP traffic carries credentials in plaintext, and packet sniffing during the authentication phase hands an attacker everything they need. This is precisely why a migration to TLS 1.2 or TLS 1.3 is not a nicety but a baseline requirement — interception of plaintext sessions remains one of the most trivial man-in-the-middle techniques in circulation.
Default CentOS 8 and Nginx configurations were never designed to withstand this. They favor a working installation over a hardened one. For production, that gap has to be closed deliberately, layer by layer.
Analyzing Nginx Vulnerabilities on CentOS 8
Two attack vectors dominate the practical threat model: interception of unencrypted traffic, and repeated authentication failures against exposed login surfaces. Encryption addresses the first. An intrusion prevention layer addresses the second. Neither alone is sufficient, which is the theoretical case for combining cryptographic protocols with a log-driven banning system.
CentOS 8 complicates this in a useful way. SELinux and firewalld both sit between Nginx and the network, and both will block traffic you assume should flow freely. The common shortcut here is to disable SELinux entirely. We declined that route. Instead, the work involved mapping the precise boolean values required to permit Nginx connectivity while keeping kernel-level mandatory access controls intact.
SELinux and Firewalld Considerations
For Nginx to act as a proxy, the httpd_can_network_connect boolean must be toggled to 1. Without it, connections fail silently in ways that look like application bugs but are actually policy enforcement doing its job.
Firewalld demands the same explicitness. The public zone needs rules permitting incoming TCP traffic on ports 80 and 443. Until those rules exist, the outside world simply cannot reach your web server — a detail that becomes critical the moment you request a certificate.
Caution: Disabling SELinux to "make things work" trades a contained, auditable failure for an unbounded one. Toggle the specific boolean instead.
Prerequisites and Scope of Implementation
This guide was scoped deliberately for standalone environments. The intent is to keep every step actionable for homelab administrators working without enterprise-grade hardware, rather than assuming a fleet of nodes behind a managed load balancer.
You will need a functional CentOS 8 server with root or sudo privileges, and a registered domain whose DNS A-records point to the server's public IP. That second requirement carries a timing cost: A-record changes require a propagation window of roughly 12 to 48 hours before Let's Encrypt validation can reliably resolve the domain. Attempting certificate issuance before propagation completes is a frequent and avoidable source of failure.
One operational note worth stating plainly. CentOS 8 reached end-of-life on December 31, 2021, which means ongoing repository support now requires a transition to CentOS Stream or a compatible fork. The techniques described here remain valid, but your package sources should reflect that shift.
Main Point: One catch — this implementation assumes a standard standalone LEMP stack. It does not cover advanced reverse-proxy load balancing across multiple nodes or custom SELinux policy compilation.
Deploying Let's Encrypt for SSL/TLS Encryption
Certbot is the ACME client of choice here, chosen for its native integration with the EPEL repository and its ability to parse and rewrite Nginx configuration automatically. That automation removes a class of hand-editing errors that otherwise creep into certificate deployment.
Installing the Client
Begin by enabling EPEL, then install the Certbot package along with its Nginx plugin. Once installed, Certbot drives the entire handshake: requesting the certificate, completing the HTTP-01 validation challenge, and writing the resulting configuration back into your server blocks.
Here is the common failure to anticipate. The HTTP-01 challenge requires inbound traffic on port 80. If firewalld is blocking that port, validation fails even when DNS is perfectly configured. Confirm the firewall permits port 80 before running the issuance command, and the challenge resolves cleanly. Full client options are documented in the Let's Encrypt Official Documentation.
Renewal and Key Exchange Hardening
Let's Encrypt certificates carry a strict 90-day validity period. This is intentional, and it makes automated renewal mandatory rather than optional. Certbot installs systemd timers that handle the renewal checks without intervention, so the short lifespan becomes a non-issue once configured.
To strengthen key exchange, generate a dedicated Diffie-Hellman parameter file. A 2048-bit dhparam.pem takes roughly 2 to 5 minutes to produce, depending on available CPU entropy. The wait is one-time and the resulting forward secrecy is well worth it.
Expert Tip: Run the dhparam generation in a separate terminal while you configure your jails. The two tasks are independent, and parallelizing them saves a measurable chunk of setup time.
Configuring Fail2Ban to Mitigate Brute-Force Attacks
Encryption protects data in transit. Fail2Ban protects the authentication surface from relentless guessing. It works by parsing log files, matching failure patterns through defined filters, and instructing the firewall to ban offending addresses for a set duration.
The configuration strategy here matters as much as the rules themselves. All custom settings belong in a separate jail.local file. This isolation guarantees that upstream package updates will not overwrite your intrusion prevention thresholds — a quiet but costly surprise if you edit the distributed jail.conf directly.
Jail Architecture and Defaults
The default bantime is 3600 seconds, paired with a findtime window of 600 seconds. In plain terms: an address that triggers enough failures inside a ten-minute window earns a one-hour ban. These defaults are sensible starting points, not immutable law.
For Nginx specifically, enable filters such as nginx-http-auth and nginx-botsearch. The nginx-http-auth filter watches /var/log/nginx/error.log for 401 and 403 response codes, triggering a ban after about 3 to 5 failed attempts.
That threshold deserves thought. Set maxretry too low and legitimate users fumbling a password lock themselves out. Set it too high and you give automated scrapers more runway. Tune the value against the actual frequency of genuine login failures on your service versus the volume of bot traffic in your logs — the right number is environment-specific, not universal.
Validating Security Protocols and Maintenance
The validation phase relies entirely on native command-line utilities. The goal was immediate, dependency-free feedback on both the syntax and the operational status of each security layer, with nothing to install and nothing to second-guess.
Start with the configuration itself. The nginx -t command parses the entire configuration tree in under 2 seconds, surfacing syntax errors before a service reload can take a broken config live. Treat a clean result here as a precondition for every reload, not an occasional check.
Next, confirm Fail2Ban is actually watching what you think it is. The fail2ban-client status output lists active jails and the log paths each one monitors. A jail that is enabled but pointed at the wrong log is worse than no jail at all, because it creates false confidence.
Establishing a Maintenance Rhythm
Security is a schedule, not an event. Build a routine audit covering server logs and firewall rules. Log rotation policies typically archive Fail2Ban and Nginx logs for roughly 7 to 14 days before deletion to conserve disk space, so any forensic review needs to happen inside that window.
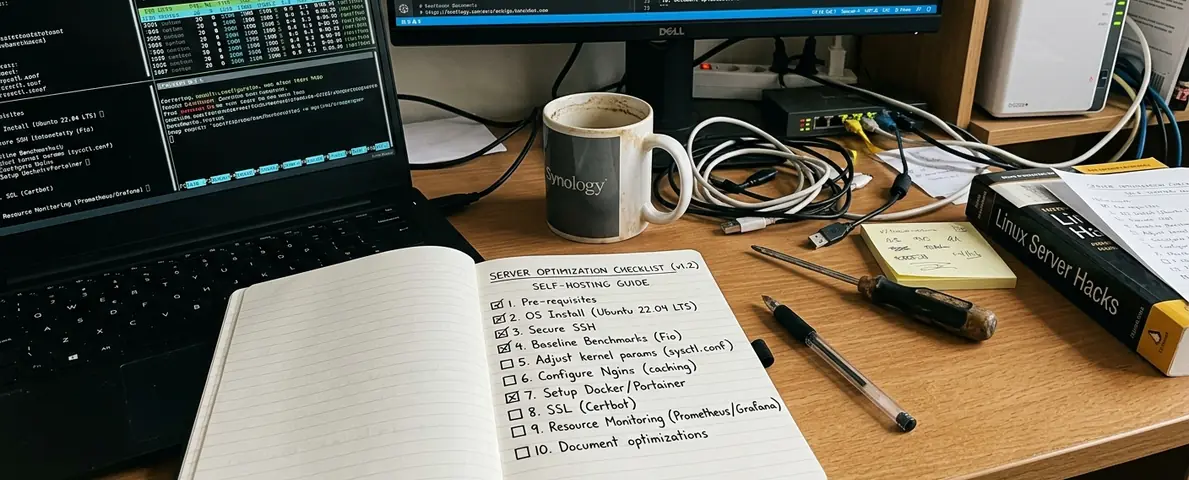
Use the pre-flight checklist below before exposing the server, and revisit it after any major configuration change. These figures and thresholds reflect a standard standalone deployment; brute-force patterns and legitimate-failure rates vary by service, so treat the tuning values as starting points to refine against your own logs.


Leave a Comment